


Preset Basics

This is a simple tutorial on how to set up your material file and preset UV images. This will not explain preset effects.
The character creator screen has been updated since this tutorial, but it all still works the same!
Heres a downloadable attachment with just the .material code if you don't want to copy it from the webpage.
To start you will need a .material, this will be where all the code for your preset is kept. Create a notepad and paste this code into it. Be sure there are no spaces at the top or bottom of the text.
material Username_Charname/ManeMat
{
receive_shadows on
technique
{
pass
{
ambient 1.000000 1.000000 1.000000 1.000000
diffuse 1.000000 1.000000 1.000000 1.000000
specular 0.010000 0.010000 0.010000 1.000000
emissive 0.000000 0.000000 0.000000 1.000000
cull_hardware none
cull_software none
scene_blend alpha_blend
texture_unit
{
texture Username_CharnameMane.png
tex_address_mode wrap
filtering trilinear
}
}
}
}
material Username_Charname/TeethMat
{
receive_shadows on
technique
{
pass
{
ambient 1.000000 1.000000 1.000000 1.000000
diffuse 1.000000 1.000000 1.000000 1.000000
specular 0.010000 0.010000 0.010000 1.000000
emissive 0.000000 0.000000 0.000000 1.000000
cull_hardware none
cull_software none
scene_blend alpha_blend
texture_unit
{
texture Username_CharnameTeethTex.png
tex_address_mode wrap
filtering trilinear
}
}
}
}
material Username_Charname/HeadMat
{
receive_shadows on
technique
{
pass
{
ambient 1.000000 1.000000 1.000000 1.000000
diffuse 1.000000 1.000000 1.000000 1.000000
specular 0.010000 0.010000 0.010000 1.000000
emissive 0.000000 0.000000 0.000000 1.000000
cull_hardware none
cull_software none
scene_blend alpha_blend
texture_unit
{
texture Username_CharnameHead.png
tex_address_mode wrap
filtering trilinear
}
}
}
}
material Username_Charname/EyeMat
{
receive_shadows on
technique
{
pass
{
ambient 1.000000 1.000000 1.000000 1.000000
diffuse 1.000000 1.000000 1.000000 1.000000
specular 0.010000 0.010000 0.010000 1.000000
emissive 0.000000 0.000000 0.000000 1.000000
cull_hardware none
cull_software none
scene_blend alpha_blend
texture_unit
{
texture Username_CharnameEye.png
tex_address_mode wrap
filtering trilinear
}
}
}
}
material Username_Charname/BodyMat
{
receive_shadows on
technique
{
pass
{
ambient 1.000000 1.000000 1.000000 1.000000
diffuse 1.000000 1.000000 1.000000 1.000000
specular 0.010000 0.010000 0.010000 1.000000
emissive 0.000000 0.000000 0.000000 1.000000
cull_hardware none
cull_software none
scene_blend alpha_blend
texture_unit
{
texture Username_CharnameBody.png
tex_address_mode wrap
filtering trilinear
}
}
}
}
material Username_Charname/TailMat
{
receive_shadows on
technique
{
pass
{
ambient 1.000000 1.000000 1.000000 1.000000
diffuse 1.000000 1.000000 1.000000 1.000000
specular 0.010000 0.010000 0.010000 1.000000
emissive 0.000000 0.000000 0.000000 1.000000
cull_hardware none
cull_software none
scene_blend alpha_blend
texture_unit
{
texture Username_CharnameTail.png
tex_address_mode wrap
filtering trilinear
}
}
}
}
material Username_Charname/WingMat
{
receive_shadows on
technique
{
pass
{
ambient 1.000000 1.000000 1.000000 1.000000
diffuse 1.000000 1.000000 1.000000 1.000000
specular 0.010000 0.010000 0.010000 1.000000
emissive 0.000000 0.000000 0.000000 1.000000
cull_hardware none
cull_software none
scene_blend alpha_blend
texture_unit
{
texture Username_CharnameWings.png
tex_address_mode wrap
filtering trilinear
}
}
}
}
It should look like this.
Now that you have that pasted into a notepad you’ll want to name the file
Username_Charname.material
Replace Username with your in-game username and replace Charname with the character's name. For Example “Cassius_Striker.material” Cassius is the username and Striker is the character name.
When saving your material file be sure to "Save As" and select "All Files"


From here you will need to change every “Username_Charname” in your text file, that's highlighted here in orange, the same way you did to name the file. Change Username to your username and Charname to the name of the character. It is crucial that everything is spelled correctly with no errors, otherwise it will not work. Example: Cassius being the username and Striker being the character’s name.

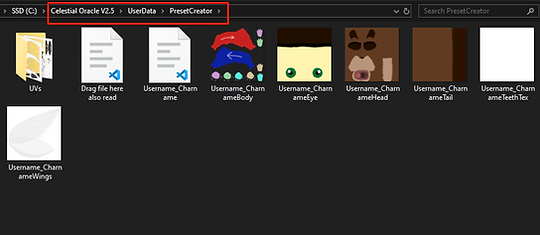
Now save that file and put it in the Campaigns folder
Celestial Oracle\UserData\PresetCreator
Next you will need UV’s, this will be essentially the skin of your character, the images you draw on to create the preset. In order for the character to work everything in the .material file will need a UV image, otherwise the parts without them will show up untextured white in-game. Pick out the parts you want in-game and find it’s matching UV, this is what you’ll be coloring on.


You can grab the required UV’s in the UVs folder.
Celestial Oracle\UserData\PresetCreator\UVs
NOTE:
Here you will find only two head UVs for the default models.
Head1, Head3, Head5, Head7, and Head9 use “HeadRound” the rest use “HeadPointed”.

Grab the required UV’s for your preset and put those in the Campaigns folder as well. From here you will begin to name every UV appropriately. Following the same format as before you will name them Username_CharnamePart.png
Of course change the username and charname to what you’re using, replace Part with what part it’s for. For example “Cassius_StrikerBody.png” this part is for the body.

Now do that for all the UV’s you’re using and make sure they are named exactly the same as in the .material or else it will not work. For example here is the name in the material vs the name of the UV image.


All the UV’s you’ll need:
Username_CharnameMane.png
Username_CharnameHead.png
Username_CharnameEye.png
Username_CharnameBody.png
Username_CharnameTail.png
Username_CharnameWings.png
Once you have your .material and all your UV’s ready you can test it in game!
Create a character and click on Preset

A bar will pop up with your “username_” put the name of the Username_Charname here and click apply. If everything is done correctly the preset should show up in-game.


That’s everything! I hope this helps out anyone wanting to get into preset making.
EXTRA
If there is a part in the .material you do not want you can simply delete it’s code, we will use wings as the example here. Select just below the four } above the code, where the material line starts, and go all the way down to the next four } and simply delete it.

TUFTS
To add a tuft you can just copy and paste this code in like so. Same formula for adding other parts as well.
When adding more than one tuft, copy and paste the tuft code than add 2 after tuft on the material line, like so:
material Username_Charname/TuftMat
material Username_Charname/Tuft2Mat
material Username_Charname/TuftMat
{
receive_shadows on
technique
{
pass
{
ambient 1.000000 1.000000 1.000000 1.000000
diffuse 1.000000 1.000000 1.000000 1.000000
specular 0.010000 0.010000 0.010000 1.000000
emissive 0.000000 0.000000 0.000000 1.000000
cull_hardware none
cull_software none
scene_blend alpha_blend
texture_unit
{
texture Username_CharnameTuft.png
tex_address_mode wrap
filtering trilinear
}
}
}
}
Top and Bottom Wing Textures
Makes wings have a top and bottom texture, even the Trophy Models.
Replace your /WingMat section of code with this instead.
(This does not work correctly with all wings)
material Username_Charactername/WingMat
{
receive_shadows off
technique
{
pass
{
ambient 1.000000 1.000000 1.000000 1.000000
diffuse 1.000000 1.000000 1.000000 1.000000
specular 0.010000 0.010000 0.010000 1.000000
emissive 0.000000 0.000000 0.000000 1.000000
cull_hardware none
cull_software none
alpha_rejection greater_equal 128
texture_unit
{
texture Username_Characternamewings_bottomTex.png
tex_address_mode wrap
filtering trilinear
}
}
pass
{
ambient 1.000000 1.000000 1.000000 1.000000
diffuse 1.000000 1.000000 1.000000 1.000000
specular 0.010000 0.010000 0.010000 1.000000
emissive 0.000000 0.000000 0.000000 1.000000
alpha_rejection greater_equal 128
texture_unit
{
texture Username_Characternamewings_topTex.png
tex_address_mode wrap
filtering trilinear
}
}
}
}